
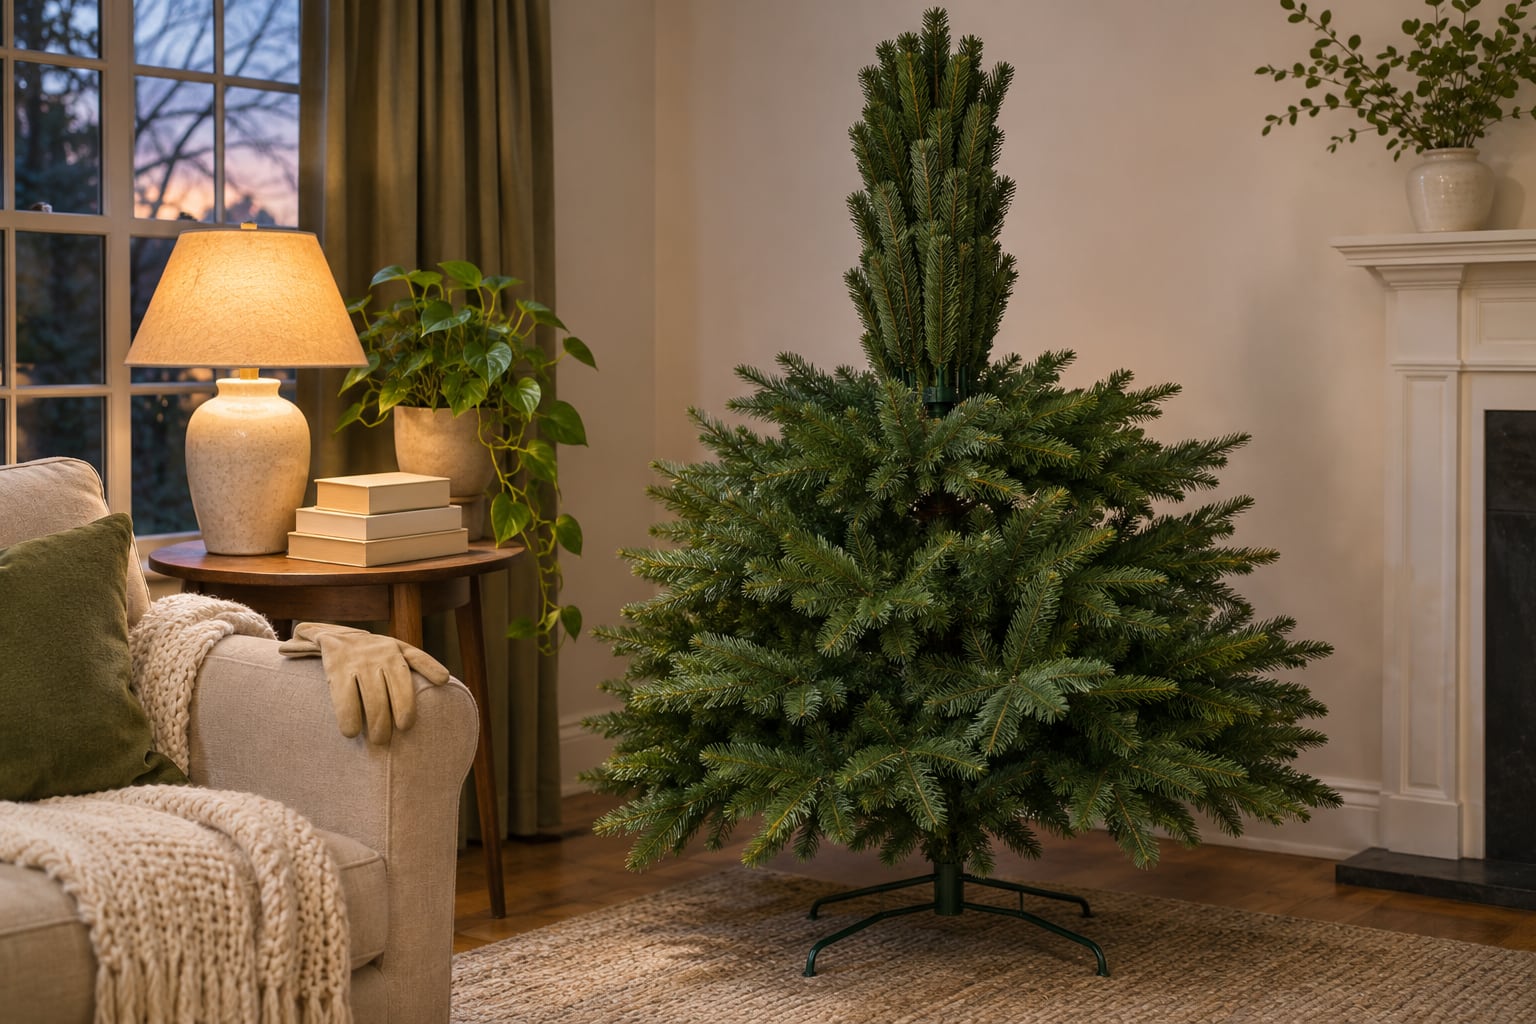
Fluff an artificial Christmas tree one section at a time, from the bottom up. Set the bottom section in the stand and go around it one row of branches at a time. On each branch, start next to the pole and work out to the end: lift the inner tips so they hide the pole, spread the side tips away from the center tip, and pull apart any tips that came out of the box stuck together. Finish the section, add the next one, and repeat. Then step back and fix the thin spots.
Balsam Hill's and National Tree Company's instructions both describe a version of that method. The first time takes the longest. Balsam Hill tells owners to plan on two people and two to three hours, depending on the tree's height and fullness. Memory-wire branches cut the work by very different amounts from tree to tree, and later years go faster.
Before You Start
- Gloves and long sleeves. Branch wire and stiff needles scratch, and you'll be reaching deep into the tree. Light gardening gloves are plenty, and Balsam Hill puts a pair in the box with its trees.
- The tree's final spot. Set the stand up where the tree will stay. A fluffed tree is wide and awkward to move.
- Photos of your model. The product photos show the shape you're aiming for, including whether the tips sweep up, sweep down, or stick straight out.
- A sheet, if the tree is flocked. Some flocked trees shed while you fluff. Our GE Flocked Candlewood Pine review notes that most of its shedding happens during setup.
- A second person, if you can get one. Balsam Hill recommends a helper for the first setup.
How to Fluff an Artificial Christmas Tree, Step by Step
- Set the bottom section in the stand and let its branches down. Undo the tie holding them up and let them drop into place. On a pre-lit tree, National Tree Company's manual warns to "be extremely careful not to tangle wire in gap between branch and bracket," which is the joint where each branch pivots, so check that the wire is clear as the branches come down.
- Start with the lowest row and go all the way around. Finish a full row before you move up to the next one. Working in order keeps you from skipping branches or redoing ones you've done.
- Begin each branch at the pole. Reach in to where the branch meets the pole and lift the innermost tips, alternating up and out to the sides. These hide the pole and fill the tree from the inside, and they're easy to skip when you only fluff what you can see.
- Work out toward the end of the branch. Spread the side tips away from the center tip so they aren't stacked on each other. Some branches have a pair of side tips that National Tree Company's manual calls wing tips. It says to pull those out to about a 45-degree angle from the center first, then spread the smaller tips separately.
- Pull apart anything stuck together. Tips are packed tight for shipping, and some come out in clumps. Balsam Hill's instructions say to pull them apart "quickly and firmly."
- Match your tree's shape. Point the tips up, down, or straight out to match your model's photos. Near the top, where the branches are short, angle the tips up more steeply toward the point. Don't make every branch identical. Real trees aren't uniform, and a little pole showing deep inside looks natural.
- Add the next section and repeat. Fluff each section before the next one goes on, so you aren't reaching through the branches above. National Tree Company's manual says shaping is "best performed during assembly," though it can wait until the tree is built. On a pre-lit tree, connect the plugs between sections as you go, which the same manual recommends for trees that don't connect through the pole.
- Finish with the top. If the tree is taller than you, fluff the top section on the floor and then set it in place. Top sections sometimes have branches wrapped against the pole, and those you pull down one at a time.
- Step back and walk around it. Look from across the room and from where you'll usually sit, and fix the thin spots (more on that below). On a pre-lit tree, plug it in and make sure every section lights. Balsam Hill suggests checking the lights as soon as the tree is up.
PE Tips and PVC Tips
PVC tips are strips of plastic film, or firmer hard-needle PVC strands, twisted into a wire like a small bottle brush. PE tips are molded, so their needles already have their shape. Our guide to PE, PVC, and build quality explains how each looks. When you're fluffing, the difference is where the effort goes.
A PE tip needs little more than angling: bend its wire stem to set the direction, and separate PE tips that are stacked on top of one another. PVC tips do the filling. On many blend trees, PE sits on the outer tips where you see it and PVC fills the inside, so the inner PVC is what makes the tree look full. Spread it in every direction around the pole. Our Grand Duchess review makes the point: the tree is marketed as needing minimal fluffing, but its interior PVC branches still need work before it looks full. An all-PVC tree, which is normal for traditional and budget trees, gets that inside-out spread on every branch.
Pre-Lit and Unlit Trees
On a pre-lit tree, the light strings are fastened along the branches, so they limit how far a tip can move. Our Vermont White Spruce review notes that each branch splits into sub-branches you can position separately, "lighting wiring permitting." If a tip won't go where you want, look for a wire before you pull harder. The lights help in one way: with the room dim and the tree lit, thin spots show up as dark patches.
On an unlit tree, finish fluffing before the lights go on, so you're weaving strands through branches that are already where they'll stay.
How Much Memory Wire Saves
Memory wire is wire in the branches that holds a preset shape and springs back to it when the branches drop. National Tree Company calls its version Memory-Shape. A name on the box isn't proof, though. In our reviews, the label "Simple Shape" turns up on one tree with memory wire and on one without it, and the Deluxe Noble Fir is sold as "pre-fluffed" while owners still report significant gaps. Check the specs for memory wire itself.
How much fluffing it saves depends on the tree. Our Elegant Grand Fir review describes branches that fall into place with no fluffing at all, on a tree that's 100% PE with no PVC filler. On the Yorkshire Fir, reviewers mention needing minimal fluffing. Our review of the Breckenridge Downswept Fraser Fir, which also has memory wire, says it needs significant fluffing to look full.
National Tree Company's own wording covers a similar range. Its assembly instructions say Memory-Shape trees "do not require extensive branch shaping" and that "minimal shaping may be required to fill obvious holes or openings." Its product page for the 7.5 ft Sheridan Spruce Memory-Shape tree gives three answers. The description says Memory-Shape "reduces set-up time to mere minutes," the page's FAQ says to spend 20 to 30 minutes, and its design details say to "set aside 45-60 minutes to properly shape the tree." With a Memory-Shape tree, plan on the hour.
On any memory-wire tree, let the branches drop, then spend your time on the inner tips and the gaps. The main branch tends to spring back to its preset angle, so adjust the tips and leave the branch where it lands.
How Long Does It Take to Fluff a Christmas Tree?
Balsam Hill's fluffing guide tells owners that, "depending on the height and fullness of your tree," two people should plan on two to three hours the first time it comes out of the box, and "considerably less in succeeding seasons." National Tree Company's Sheridan Spruce page tops out at an hour, for a memory-wire tree.
Whatever the brand, the time depends on how much there is to spread. A taller tree has more rows. Dense branches, and branches split into sub-branches, have more tips per row. More interior PVC means more filler to spread out, and memory wire takes some of the positioning off your hands. For a full tree with no memory wire, plan around Balsam Hill's figure and start early in the day. A memory-wire tree with little interior PVC can take a fraction of that.
If you're short on time, the safe shortcuts are a second person, a lighter pass on the side that faces a wall, and one steady pass around the tree followed by fixes from a distance, instead of perfecting each branch as you go. Skipping the inner tips is the shortcut that shows.
How to Make an Artificial Tree Look Fuller
Re-fluff before you cover anything up.
- Turn the tree first. Put its fullest side toward the room, so you know which gaps matter.
- Re-fluff around each gap. Pull tips from the branches above, below, and beside it toward the hole, and lift the inner tips nearest the pole. Check where the sections meet, too. Our Snowy Berkshire review calls out gaps at the section joints, which are easy to miss when you fluff one section at a time.
- Get a second opinion. Balsam Hill suggests having one person stand back while the other fluffs, until the tree looks even.
- Cover what's left. For a gap that won't close, Balsam Hill suggests a larger ornament or a tree pick, and an ornament hung deeper in the tree hides a stretch of visible pole. Garland in the same green, tucked into the branches, adds bulk to a thin tree. Family Handyman's version of that trick uses about three strands on a standard tree.
If you still see big gaps from six to eight feet away after all that, it's the tree. Our realism guide treats gaps like that as a design flaw that fluffing can't fix. On a new tree, contact the seller soon. Some only take change-of-mind returns on trees that were never assembled, and their rules for damaged or defective trees can be different.
Making Next Year Faster
Balsam Hill's FAQ says "dedicating a few hours the first time makes fluffing easier in following years," and how you pack the tree away matters too. National Tree Company's manual says to "gently compress the tips back into the center of each tree branch," then raise the branches to their upright position "taking care not to place undue pressure on the attached ends of the branches." It's fluffing in reverse, and it's gentler on the tips than cramming branches into a bag. If the tree won't fit back in its bag or box, get a bigger one. Our setup and storage guide covers bags, boxes, and where to keep the tree.
Before you take it apart, photograph the fluffed tree and label the sections. Next November you'll know which way the tips went and where the thin spots were. The second fluff should be shorter, though it's still a full pass around the tree.