
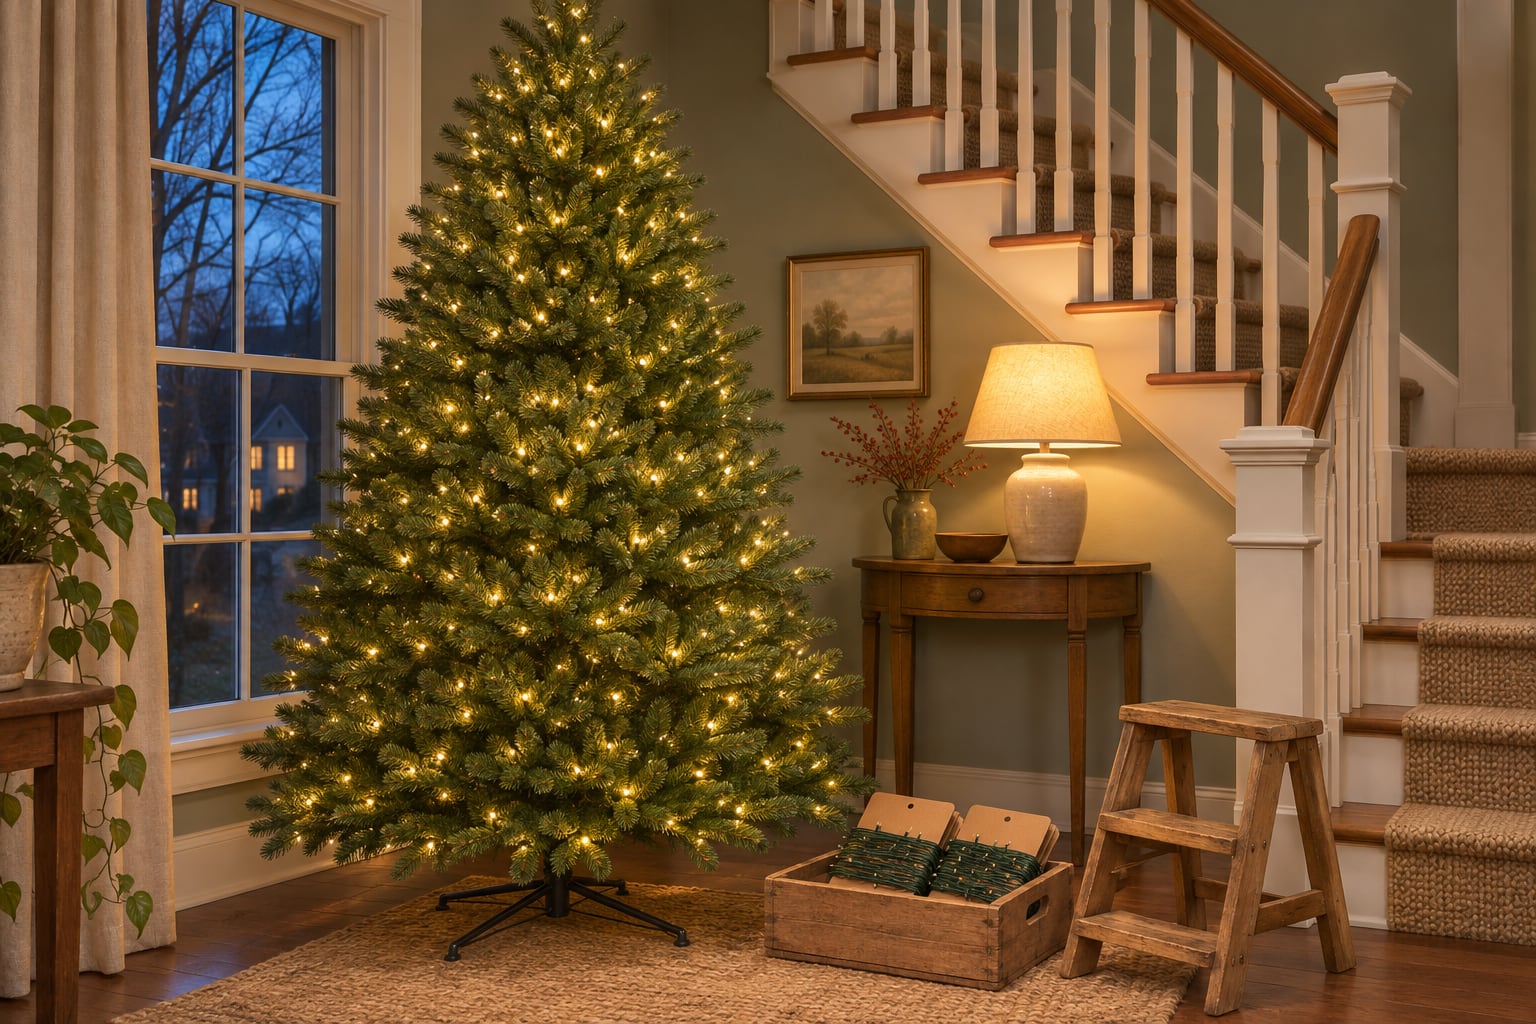
To hang lights on an artificial Christmas tree, light it one section at a time. Fluff the bottom section, plug in your first strand, and start at the pole near the bottom of the section with the strand's plug end hanging down. Weave the strand out along a branch toward the tip and back toward the pole, then on to the next branch, working around the section and up. Finish the section's last strand near the pole at the top of that section, and never carry a strand across the joint to the next one.
That rule is what lets the tree come apart after Christmas without unwinding anything: each section lifts off with its own lights, which can even stay on the branches through storage. On a real tree, or any tree that doesn't come apart, the weave is the same, done as one job from the bottom up. For how many lights to buy, see our chart of lights by tree height.
Before the First Strand Goes On
Fluff the tree first. Balsam Hill's assembly guide gives the order: "Start by fluffing the branches to create a full shape, then add lights if you'll be using your own. Follow that with garlands or ribbons, then finish with ornaments and a tree topper." Lights added after fluffing don't get dragged out of place when you shape the branches. Our fluffing guide also works one section at a time, so you can fluff a section, light it, and move up.
Test every strand. Look each one over unplugged first. The CPSC says to check every set, "new or old, for broken or cracked sockets, frayed or bare wires, or loose connections," and to "throw out damaged sets." NFPA adds that lights should be "listed by a qualified testing laboratory." Then plug each strand in on the floor to find dark spots, which are much quicker to track down there than on a branch. Our guide to fixing dark sections covers finding the bad bulb.
Split the lights between sections. The bottom section has the most branch to cover and the top the least. If your tree has three sections of about the same height, rough cone geometry gives the bottom section a little over half of the tree's outer surface, the middle a third, and the top about a tenth. With nine strands, that's five on the bottom, three in the middle, and one on top. Counting this out first keeps you from using up the box on the bottom section and coming up short at the top.
Plan the power. A run is a chain of strands plugged end to end into one outlet. NFPA's tip sheet says to "read manufacturer's instructions for number of light strands to connect," and that number is printed on the tag near each strand's plug. For incandescent sets, there's a firmer cap: the CPSC says to "never string together more than three sets," even if a tag allows more.
- With LED minis, most tags allow a whole tree on one run. You can chain straight through, plugging each section into the socket left at the top of the one below, or give each section a run of its own.
- With incandescent minis, a 7.5-foot tree needs three or more runs, and some of them start partway up the tree, far from the wall outlet. That takes outlets on the pole: a tree extension cord or sockets built into the pole, both covered below. In the split above, the bottom section's five strands make two runs on their own.
Match the wire to the tree. Green wire disappears into a green tree. On a white or heavily flocked tree, white wire hides better.
How to Hang Lights on an Artificial Tree, Step by Step
- Set up and fluff the bottom section where the tree will stand. Pick a spot where the cord won't cross a walkway. The CPSC's electrical safety checklist says to "move all cords so they are out of the path of foot traffic." If you're using a tree extension cord, fasten its first stretch up the back of this section's pole now, before any lights go on. Plug the first strand in and leave it lit while you work, so you can see where the light lands.
- Start at the pole, at the bottom. Put the strand's plug end at the pole, low on the side that faces the outlet or the wall, so the cord drops straight down behind the tree.
- Weave out and back along each branch. Run the strand along a branch from near the pole out toward the tip, give it a loose turn around the branch near the tip so it stays put, and bring it back toward the pole before moving to the next branch. Go all the way around the bottom tier, then move up a tier. Leave a few bulbs deep near the pole and spread the rest along the outer two-thirds of each branch. King of Christmas's guide to lighting an unlit tree explains why: "A tree can have plenty of lights and still appear flat when every bulb sits near the branch tips."
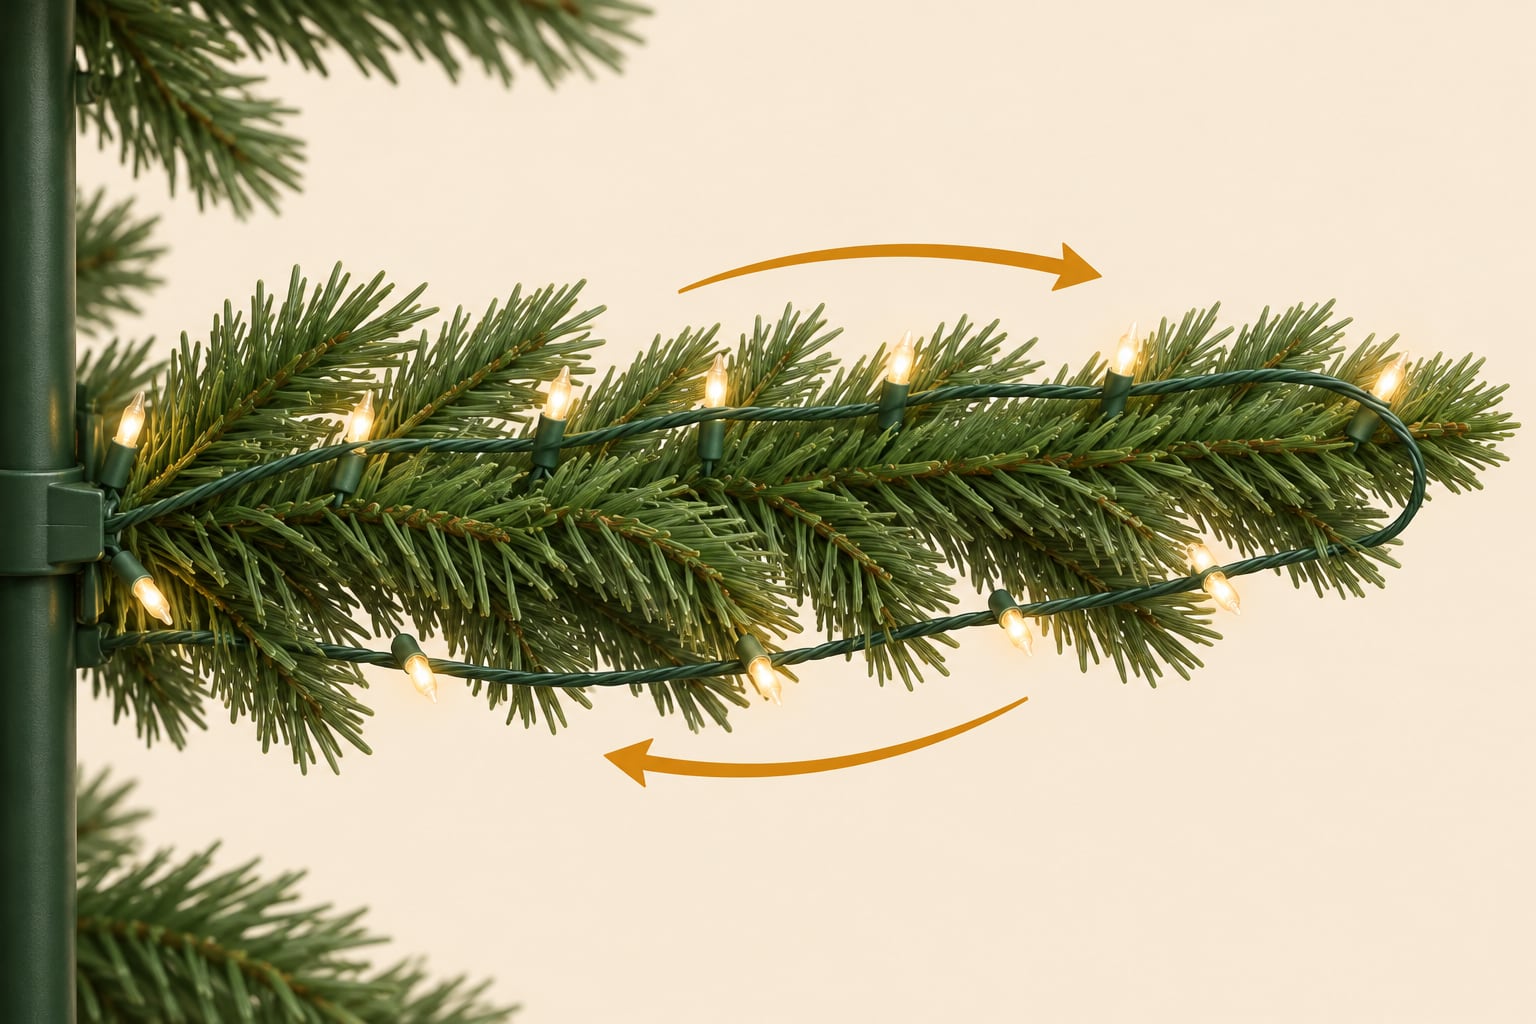
- Add strands as you go, up to the run's limit. When a strand runs out, plug the next one into its end and tuck the connection under a branch, close to the pole if you can. When a run is full, start the next strand at the pole and plug it into the tree cord or a pole socket. Push any socket you don't use deep into the branches.
- Finish the section at the top, by the pole. Plan the last strand so its open end, the socket, lands near the pole at the top of the section. If you'll have strand left over, take up the slack lower down with an extra pass along a branch or two. If it comes up a little short, run the end straight up along the pole. Clip the socket to a branch a few inches from the top of the pole, with some slack, so it doesn't get pinched when the next section's pole slides in.
- Stack the next section, then connect it. Set it in place, fasten the next stretch of tree cord to its pole if you're using one, and fluff it. Start its first strand at the bottom of the section with the plug end at the pole, clipped a few inches above the joint. Plug it into the waiting socket if that run has room, or into the tree cord if it doesn't. Then light this section the same way.
- Fluff and light the top section on the floor if the tree is taller than you, then set it in place and connect it. Its last strand ends at the tip. Plug a lighted topper in there only if it's the same kind of light and the tag's limit leaves room for it; otherwise give it its own outlet.
- Turn off the room lights and step back. Dark patches and bright clumps show up best in a dim room. Check the tree from the sofa and from the doorway, and move loops around before any garland or ornaments go on.
Weave, Wrap, or Zigzag?
There are three common ways to run lights through a tree. On an artificial tree, any of them works as long as each strand stays within one section.
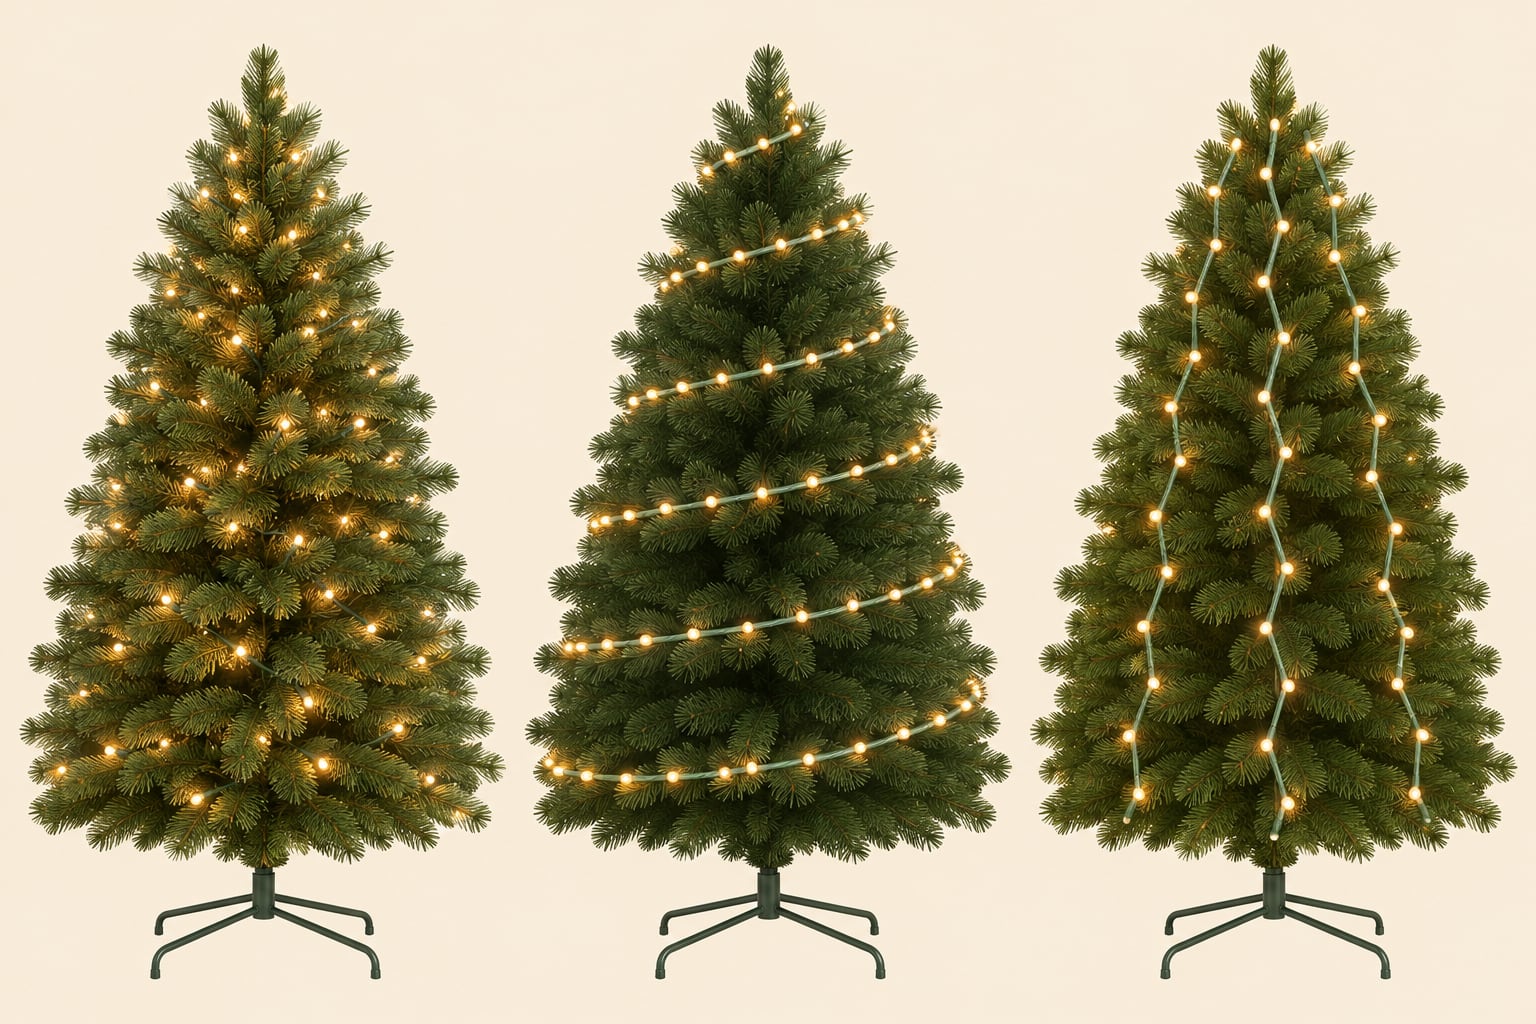
Weaving along the branches is the method above. It's the slowest and uses the most lights, but it puts light at every depth, and because the strand follows each branch, the branches can still fold up toward the pole with the lights on them. That's the method we'd use on an artificial tree.
Wrapping around the outside, circling the tree in a spiral across the branch tips, is quick. The King of Christmas guide calls wrapping only the outside "the easiest mistake," because "that lights the surface." Each loop also bridges the gap between neighboring branches, so folding the branches up for storage pulls on the strand. If you wrap, push some loops in toward the pole as you go, keep each spiral to its own section, and plan to take the lights off when the tree comes down.
Vertical zigzags run the strand up and down in narrow panels instead of around the tree. Bob Vila's guide says that, compared with stringing around the tree, going vertical "is faster, and it makes taking them off easier," and it takes fewer bulbs. On an artificial tree, keep each strand's zigzags within one section. Depending on how many passes a strand makes, its open end can finish at the bottom of the section instead of the top, so this pattern works best with a tree cord or pole sockets. Like a wrap, each pass crosses from branch to branch, so plan to take these lights off too. It suits a tree against a wall or in a corner, where you can fill the front panels and go lighter on the back.
Getting Power to Each Section
Every run needs an outlet, and on a sectioned tree there are three ways to get one to it.
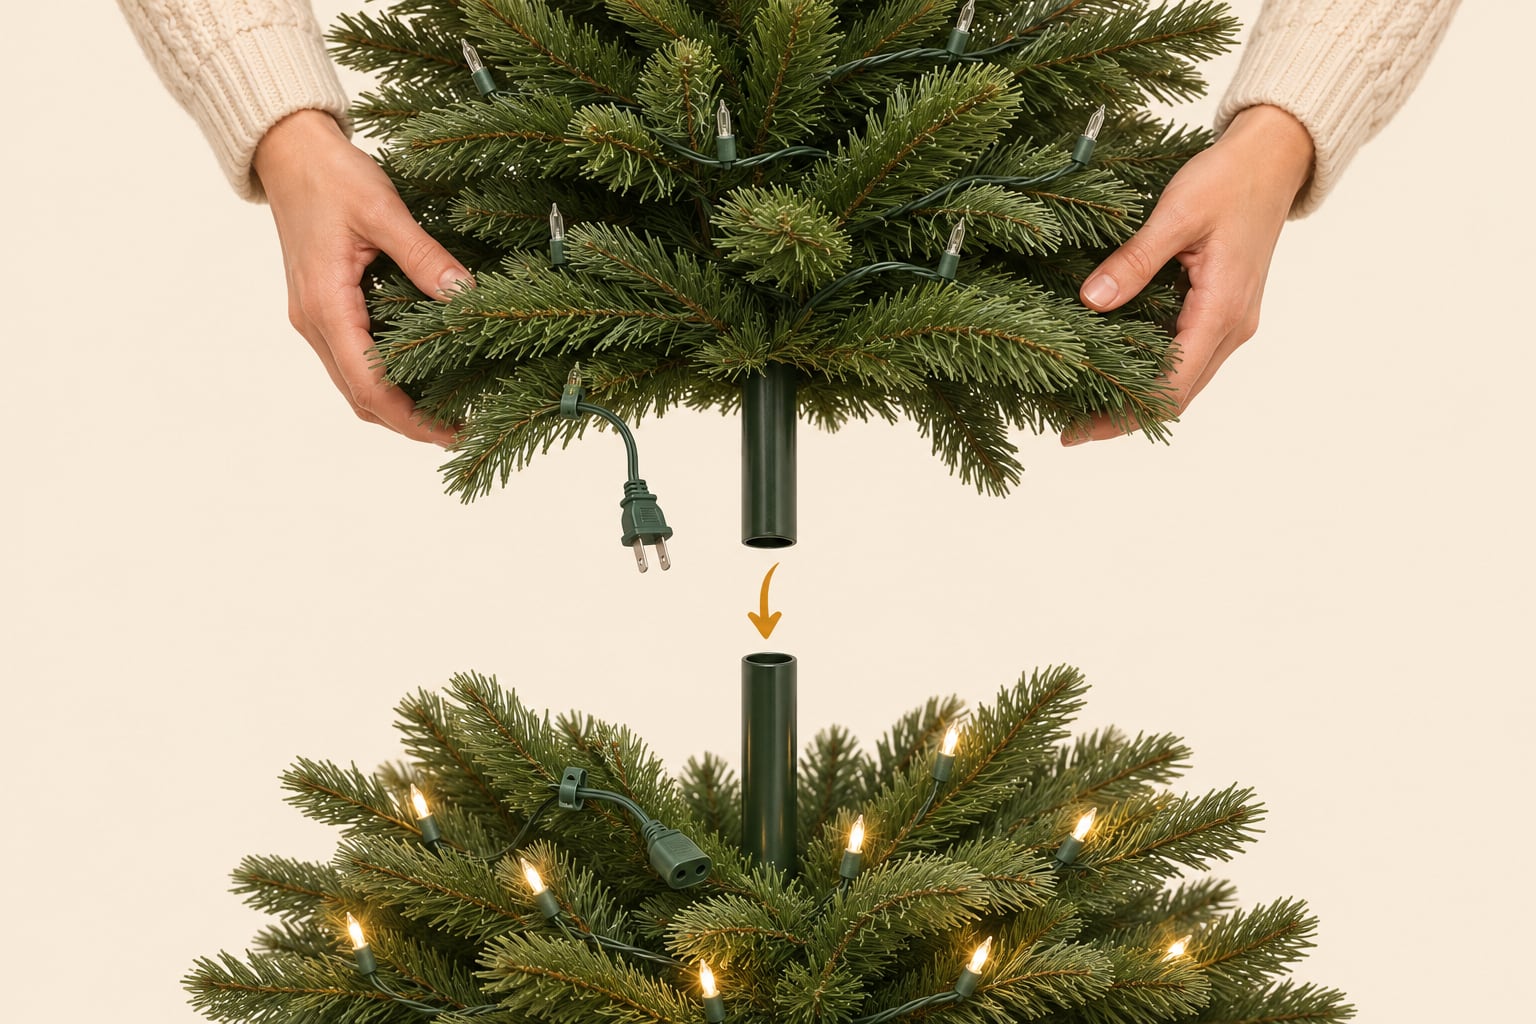
- Plug the sections together at the joints. The socket left at the top of each section takes the plug from the section above, and each joint unplugs when the tree comes apart. With LED minis, most tags let the whole tree run this way from one wall outlet.
- Run a tree extension cord up the pole. These thin green cords have groups of outlets spaced along their length. Fasten one up the back of the pole as the sections go up, using reusable ties or clips rather than winding it around the pole, since the CPSC's checklist warns that "wrapped cords trap heat that normally escapes loose cords, which can lead to melting or weakening of insulation." The same checklist says to "check the electrical rating on appliances and extension cords" and to put safety covers on unused outlets. Plug the cord into a wall outlet, not a power strip or surge protector strip: UL Standards & Engagement warns that plugging power strips or extension cords into each other "can cause an electrical fire." The cord crosses every joint, so unplug the runs and take it off before the sections come apart.
- Use sockets in the pole, if the tree has them. Balsam Hill's page on its light types says some of its unlit trees let you "string the light strands on each tree section and then plug each strand into the center pole sockets." It calls this Simple String. Check the manual for how many strands each socket can take before you plug in a chain.
Two kinds of strands need their own plan. A fairy set that runs from its own plug-in adapter can't connect to another set, so give each section its own set, plugged into the tree cord. An app-controlled strand that runs from one controller is the exception to the one-section rule: it goes on after the tree is assembled and comes off before the tree comes apart.
Keep each run to one kind of light. Family Handyman's lighting how-to warns against mixing incandescent and LED strands, and Balsam Hill's how-to for hanging lights recommends strands from the same brand with bulbs of the same wattage.
Leave the Lights On, or Take Them Off?
Balsam Hill's product pages for unlit trees suggest stringing by section so the lights can stay on for next year, and its page on light types says strands on its pole-socket trees "will stay on for future years even when you take down your tree." Its storage guide says the opposite: "If your tree is not pre-lit, unstring the lights and store them separately."
Leave them on if the branches fold up against the pole, you wove each section along its branches, and you like the result. Fasten the strand to the branches every so often with twist ties or plastic light clips, snug but not tight, so it stays put when the branches fold. Family Handyman adds a trick: pull a strand's twisted wires slightly apart "and slip tree branches through the newly-created gaps in the strand." At takedown, unplug every joint before you lift a section, and fold the branches gently. Balsam Hill's storage guide tells pre-lit owners to take extra care compressing branches so bulbs don't get damaged, and strands you've added are no tougher. Then check that the sections still fit their bag or box.
Take them off if the branches hook into the pole instead of folding, since those come off one at a time; if you change colors or bulb styles from year to year; if the sections won't fit their storage with lights on; or if you wrapped or zigzagged instead of weaving.
Taking the Lights Off Without a Tangle
Before the tree comes down, turn it on one last time and note any dark patch, so you know which strand needs attention. A dead strand is easier to deal with in January than on decorating day. Then unplug everything, take off the ornaments and garland, unplug the joints and any tree cord, and work from the top section down.
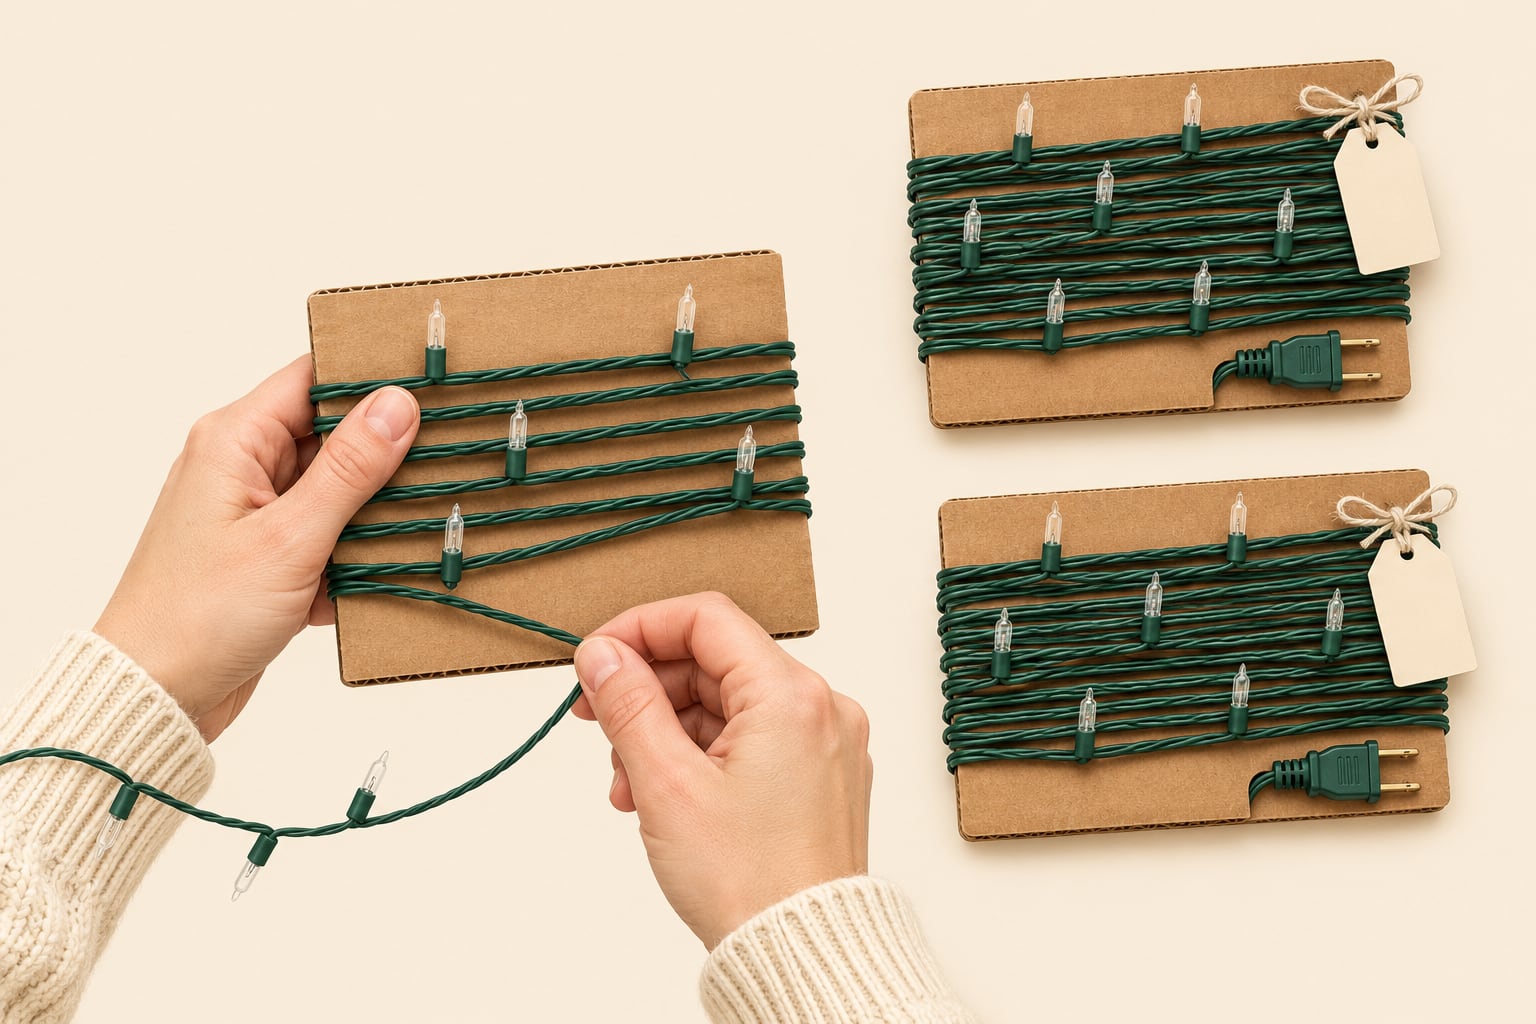
On each section, start with the last strand you put on, at the socket end near the top, and follow its path back. Wind the strand as it comes off, around a flat piece of stiff cardboard, a cord reel, or an empty wrapping paper tube, instead of pulling the whole thing off and coiling it later. One strand per winder keeps them from knotting into each other.
Label each strand with its section and its order in that section, like "bottom, 2 of 5," so next year it goes back where it fit.
Unlit Trees in Our Catalog
Two trees in our catalog are sold unlit: Balsam Hill's Vermont White Spruce and Tree Classics' Classic Fraser Fir. Each also comes pre-lit, and the pre-lit version's light count is a fair target when you light the bare one. Our pre-lit vs unlit comparison covers which way to go.
Christmas Tree Lighting Questions
Do you start at the top or the bottom when putting lights on a Christmas tree?
On an artificial tree, start at the bottom of each section with the strand's plug end at the pole. The cord drops straight toward the outlet, or toward the socket left by the section below, and the section's last strand ends at the top, where the next section or a lighted topper plugs in. Starting at the top also works on a tree you light as one piece, as long as the plug end finishes near the outlet.
Should Christmas tree lights go on vertically or horizontally?
Either works. Weaving horizontally along each branch takes longer but puts light at every depth, and on an artificial tree it lets the lights stay on when the branches fold for storage. Vertical zigzags go on and come off faster and suit a tree that stands against a wall. On an artificial tree, keep either pattern within one section, so the tree still comes apart.
Can you leave lights on an artificial tree when you store it?
Yes, if the branches fold up against the pole, each section was lit on its own, and the strands follow the branches rather than wrapping around the outside. Fasten them with twist ties or plastic light clips, unplug every joint before you lift a section, and fold the branches gently.
How do you put lights on a real Christmas tree?
The same way, minus the sections. Weave each strand out along a branch and back, working around the tree from the bottom up, with the plug end starting near the outlet. Bob Vila's guide notes that "real evergreen trees require a day to settle naturally after being placed in their stand," so give the branches time to drop before the lights go on.